Most smart lock installation problems are not the lock's fault. They are door problems, network problems, and order-of-operations problems, and all three show up before the app ever asks you for a code.
I have been on the wrong end of that enough times to have a fixed sequence. I check the bore and the backset, I confirm the bolt throws cleanly into the strike, I mount the hardware, I pair the lock to the app, and only then do I touch the gateway. When people tell me their new lock is junk, the answer is almost always that they skipped one of those and went straight to the fun part.
This guide is the order I use. It applies to a keypad deadbolt that never sees WiFi and to a full video lock that replaces your whole handleset, and it takes about 20 minutes per door once you stop guessing.
Why you should trust me
I spent five years as a working locksmith in Columbus, Ohio. I rekeyed deadbolts for landlords, drilled out seized cylinders at 7 a.m., and cut keys for tenants who lost theirs again. Around 2021 the calls changed. Landlords stopped asking for keys and started asking whether the door could just open with a code, so they could quit driving across town to hand one over.
I bought my first smart lock for $89 because I was tired of hiding a key under a rock for Airbnb guests, and that install broke something loose. Since then I have installed over 300 smart locks and doorbells, two on my own doors, a dozen for friends, and the rest for landlords, hosts, and rental properties around central Ohio.
Right now I am running 10 locks and 4 doorbells through a 90-day rental turnover test: three Airbnbs, two long-term rentals, real guests, real forgetfulness, and a Columbus winter. Every pairing failure, every missed code, and every battery drop gets logged, and that spreadsheet decides what I recommend.
How I picked these two locks and how I test them
I do not recommend a lock I have not fully installed on a real door, including the gateway pairing order and at least one deliberate factory reset. A lock that only works on a bench in a clean room is a lock I cannot vouch for.
A few rules I hold to. No battery claim without drain logging on a door that actually gets used. No claim about remote access without pairing the app and locking and unlocking from the other side of town. No "works with Alexa" claim without pairing it to Alexa and testing a voice lock and a voice unlock. No doorbell or camera claim without a night clip from a real porch at 11 p.m.
That is also why this guide only carries two locks. One of them has no app at all, and one of them has a camera. Between them they cover the two honest answers to "what should go on my front door," and neither one needs a subscription to open your own door.
The two locks I would put on a front door
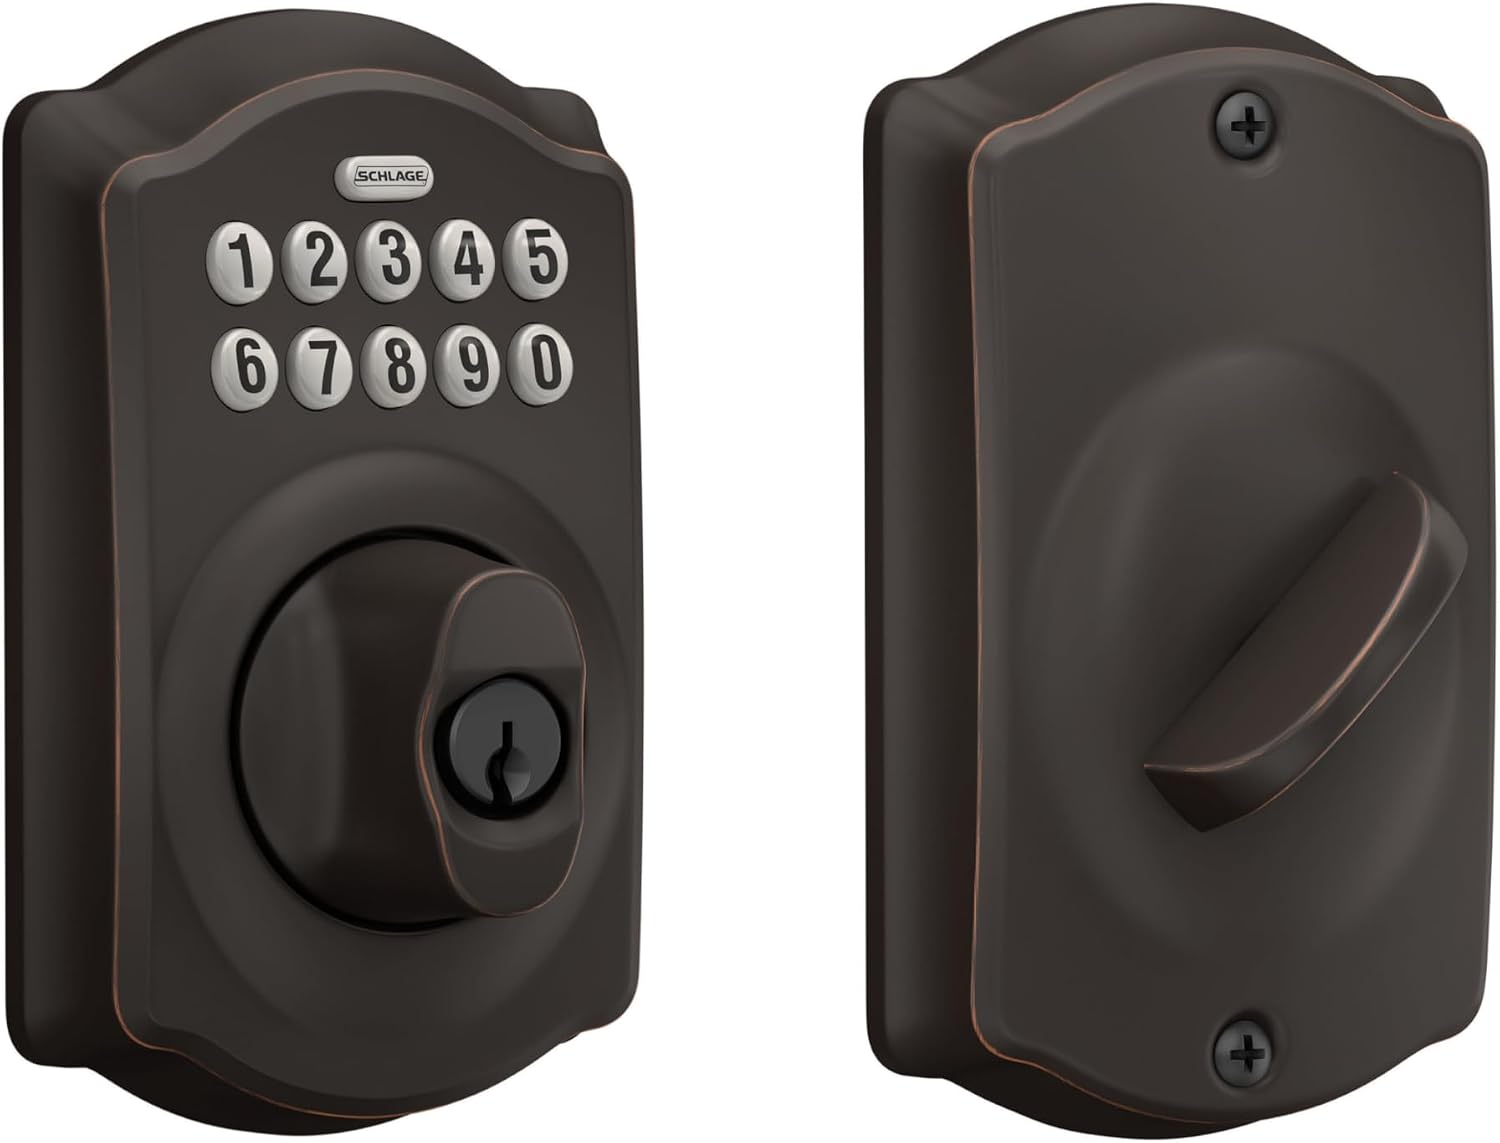
Our pick: Schlage Electronic Keypad Deadbolt Lock, Camelot Trim, Aged Bronze
 Visit on Amazon →
This is the lock I put on a door when I want the job finished and forgotten. It is a keypad deadbolt with a key override, so it replaces the deadbolt only. No gateway, no 2.4GHz band, no app to lose the pairing, no monthly fee to check anything. You set codes at the keypad and you hand a code to whoever needs in.
For a landlord or a host, that is not a compromise. It is the point. A tenant moves out, you delete the code, and you never drove across town. The Camelot trim and aged bronze finish are the reason it looks like it came with the house instead of bolted onto it, which matters more than people admit on a front door.
A buyer complaint I see constantly in this category is "instructions could be much better." Schlage's paper instructions are better than most, and the keypad programming is all done standing at the door, so you are not juggling a phone and a screwdriver at the same time. Build quality is where this one earns its keep. The bolt feels like a bolt, not a toy.
Flaws but not dealbreakers: No remote access and no app notifications. You will never know from work whether the door is locked, because there is nothing to check. If you want that, you want the other lock below. Also, this is a deadbolt only. If your existing handle is worn out, this does not fix that.
Anyone who wants codes without WiFi, and every landlord who is tired of being the key courier, should start here.
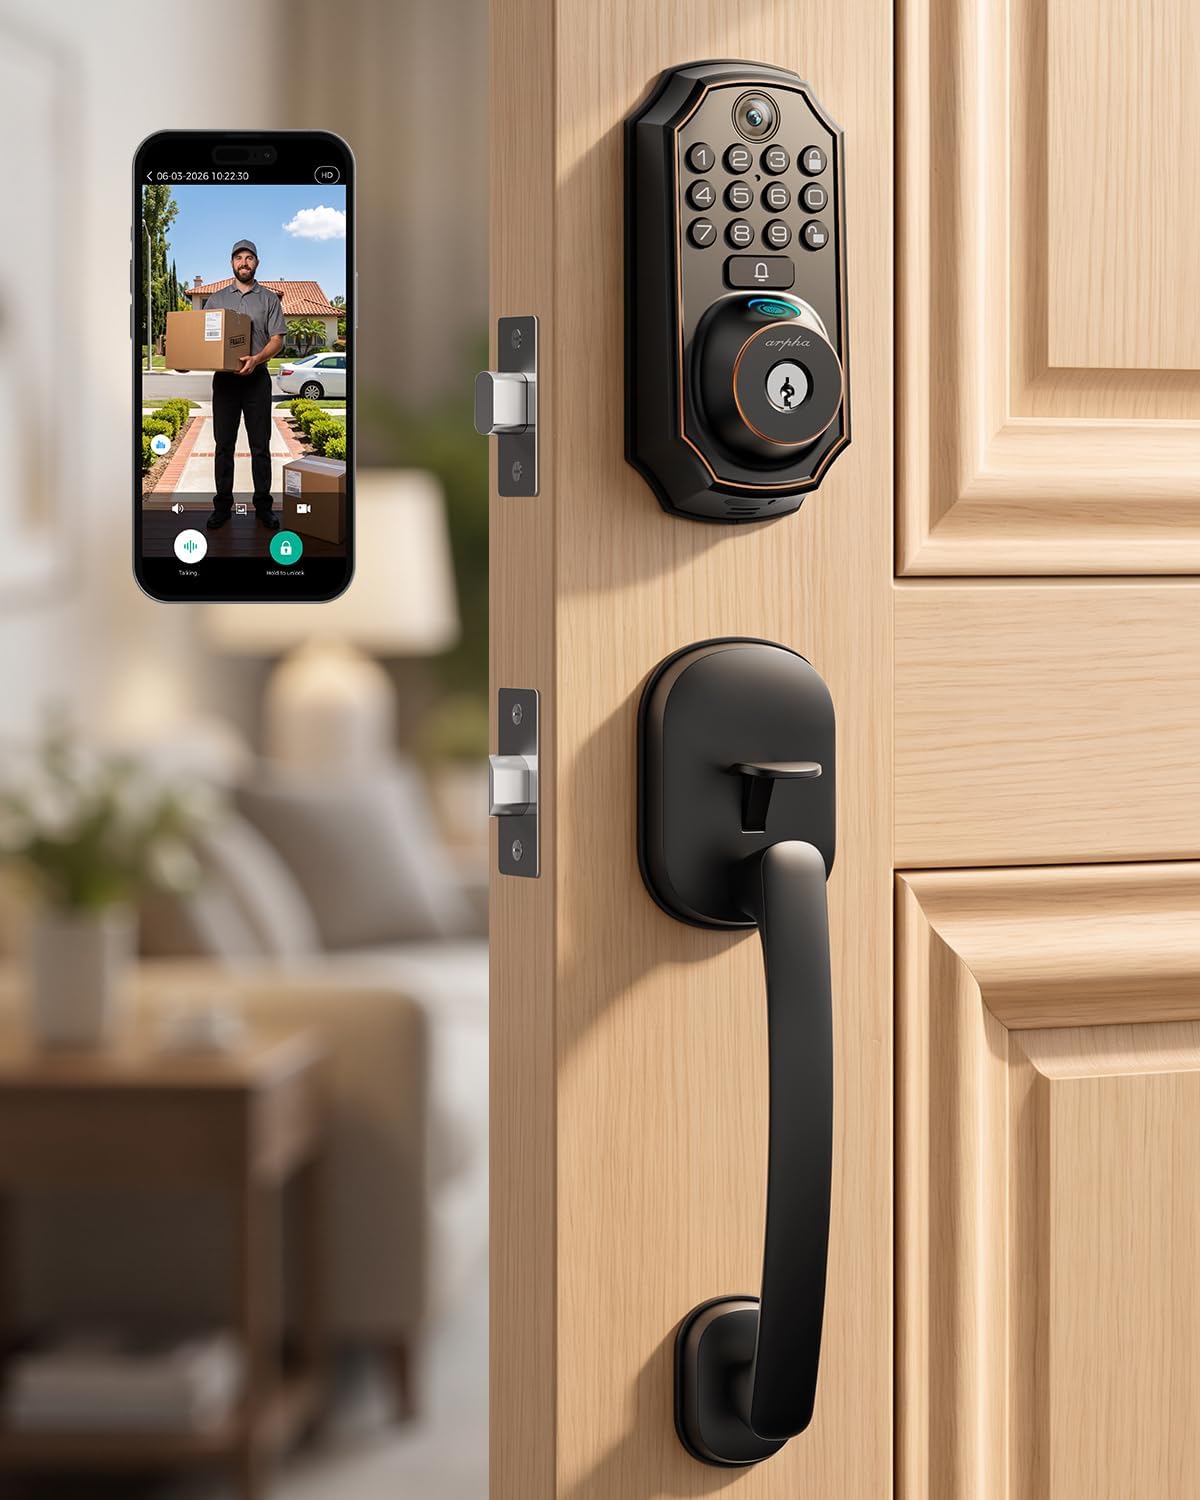
Upgrade pick: WiFi Video Smart Lock with Handle, 5-in-1 Keyless Deadbolt for Front Door
 Visit on Amazon →
This is the other honest answer: one unit that replaces the deadbolt and the handle together, adds a camera, and puts the whole door on WiFi. Keyless entry, a video view of whoever is standing on your porch, and a lock you can check and control from your phone when you are not home.
Because it is a handleset and not just a deadbolt, it is the bigger install of the two. You are fitting a handle and a deadbolt in one housing, which means your door's existing bore and backset have to line up. Measure before you order. If the spacing is off, you are either drilling or returning, and nobody wants to discover that at 10 p.m. on the night before guests arrive.
The WiFi part is where this lock lives or dies, and it is not the lock's fault. It needs the 2.4GHz band, and if your router broadcasts one merged network name or hides 2.4GHz behind a guest network, the setup gets ugly fast. Do the app first, gateway second dance, and it behaves. Before you buy, read the listing carefully on one point: some video locks charge a plan for cloud video history. If the basic live view and lock control work without a plan, that is the version most people actually want.
Flaws but not dealbreakers: The camera is the part that eats power, so watch the app's power or battery status instead of assuming. And a camera lock is a bigger commitment than a keypad, because now you are maintaining an app, a network, and a door.
Anyone who wants to see the porch and check the lock from the office should pay for this one. Anyone who only wants codes should not.
The installation sequence, step by step
Step one: Measure before you buy anything. Check your door thickness (most residential doors are 1-3/8 to 1-3/4 inches), the backset (the distance from the door edge to the center of the bore, usually 2-3/8 or 2-3/4 inches), and the bore diameter. Almost every lock ships with an adjustable latch for both backsets, but a handleset needs the deadbolt and handle holes to match its housing. Write the numbers down and take them to the listing.
Step two: Test the deadbolt throw before you install anything. With the door open, turn the existing thumbturn and watch how far the bolt extends. Then close the door and check whether it seats fully in the strike plate. If the bolt drags or the strike is misaligned, fix that first. A smart lock on a door that will not let the bolt throw is a keypad on a door, nothing more, and the door will look locked while opening with a credit card.
Step three: Pull the old hardware and clean the bore. Remove the deadbolt, the handle if you are replacing it, and the strike plate. Vacuum out the wood chips. Check that the new latch fits the edge bore without force. If the latch plate is proud of the door edge, the door will bind when it closes.
Step four: Mount the deadbolt, then the keypad side, then the interior assembly. Feed the latch, then the cable through the door, then screw the exterior keypad down, then the interior plate. Snug, not gorilla tight. On a combo unit, fit the handle after the deadbolt is set, and check that the handle spindle engages the latch properly.
Step five: Test with the door open, then closed. Door open: the bolt throws and retracts smoothly, the keypad beeps, the handle works. Door closed: the bolt drops into the strike without a shove. If you have to lean on the door, file or chisel the strike a little. This is the step people skip, and it is the one that turns a good lock into a "defective" return.
Step six: Power up and pair the lock to the app first. Fresh batteries, then the app. Find pairing mode on the lock itself. On cheap locks that is an undocumented button combination, so read the manual page nobody reads. Get the lock showing in the app before you introduce anything else to the network.
Step seven: Add the gateway second, if your lock uses one. The gateway is the little hub that bridges the lock's Bluetooth to your WiFi so you can check it from anywhere. App first, gateway second. Backwards means the gateway never finds the lock, and you are doing a factory reset, which wipes every code you just set. Confirm the gateway is on the 2.4GHz band. If your router splits bands, put the gateway on the 2.4GHz name and leave it there.
Step eight: Set your codes and your auto-lock. Master code first, then a code for each person who needs one. Add an anti-peeping digit in front of your real code if the keypad supports it, so anyone watching over your shoulder sees random numbers. Then turn on auto-lock with a delay you can live with, usually 30 seconds. For a rental, auto-lock is the feature that ends the "tenant forgot to lock up" phone call forever.
Step nine: Run the failure tests. Wrong code five times to confirm the lockout works. Key override once, with the door open. Auto-lock timing once, with a stopwatch in your head. Remote lock and unlock from the app while standing outside. Then lock it and walk away.
Where these installs actually go wrong
The deadbolt that does not fully throw is the number one silent failure. Check it every time.
The 2.4GHz requirement is the number two. The box says WiFi in large letters and the fine print says 2.4GHz, and a 5GHz-only or band-steered network will never connect.
The setup order is number three, and it costs people a factory reset. Lock to app, then gateway. Always.
The "handle turns but nothing engages" complaint on lever locks is usually a design quirk, not a defect, and the manual rarely explains it. Recheck the spindle orientation before you call support.
And one more: check the box for a deadbolt cover plate before you start drilling. Missing cover plates send people to the hardware store mid-install, and that should never be a customer's problem.
The locks I did not pick
Fingerprint-only locks look great in month one and get worse with real hands. Wet fingers, worn readers, gloves in a Columbus January. I still test fingerprint locks, but I will not recommend one without a keypad or key backup, because the day the reader quits is the day you are locked out of your own house.
Subscription locks are the other category I skip. Paying a monthly fee for basic remote access on hardware you already bought is the worst deal in smart home, and it is the reason the keypad deadbolt above stays on so many of my doors.
Retrofit cylinder covers are fine for renters who cannot change the deadbolt at all, but they are a workaround, not a front door lock.
What this all costs
Both locks here have live pricing on their Amazon listings, so check current Amazon price on the day you buy, because these move with sales. What matters more is the math per door and per year.
A keypad deadbolt is a one-time purchase with no app, no hub, and no plan. A video lock is a one-time purchase plus a network, plus a power source, plus whatever the video plan costs if you want recorded clips. Run that against how many doors you are fitting. A landlord buying six units should price the whole building, not one door.
The install itself is free if you do it. A locksmith call is not, and it is avoidable. The 20 minutes of measuring, testing the bolt throw, and pairing in the right order is the difference between a lock that just works and a support chat you will remember for years.
Do it once, save the codes, and stop thinking about your front door. That is the whole job.