Most smart locks do not fail because the hardware is bad. They fail because somebody added the gateway before the lock, or mounted a bolt without checking the backset, or handed a tenant a code on a lock that never re-locks itself. Smart lock installation is a sequence problem, and the sequence is the part the manual buries on page 14 of a foldout nobody reads.
I spent five years as a working locksmith in Columbus before smart locks were on every porch. I rekeyed deadbolts for landlords, drilled out seized cylinders at 7 a.m., and cut keys for tenants who lost theirs again. Then the calls changed. Landlords wanted codes instead of keys, hosts wanted to stop driving across town to hand over a key, and I stopped drilling locks and started installing them. I have put in over 300 of these things now, and the ones that come back to me are almost never the cheap ones. They are the ones that went in out of order.
This is the whole job, from measuring the door to handing a guest a code that works, plus the two locks I would put on a rental door if you handed me the box today.
Why you should trust me
I am not a sponsored reviewer. I am the guy who shows up with a drill, a rekey kit, and strong opinions about which locks are actually worth the money. I have installed locks for landlords, Airbnb hosts, friends, and two of my own doors. I read the manual cover to cover, I get stuck on gateway pairing like everybody else, and I have spent an hour on support chat more than once.
I also got burned. One lock I recommended had a fingerprint reader that worked beautifully for six months and died at month seven, and the owner was locked out of her own rental with a guest arriving in two hours. That is the kind of failure that changes how you buy. Every claim I make below comes from that experience: a lock is only as good as the door it is mounted on, and a feature that works at month one means nothing if it quits at month seven.
What I check before I recommend anything
Before a lock lands in my recommendation column, it has to survive the same list of questions.
Deadbolt throw. The bolt has to extend fully into the strike plate every single time. If it does not, the door looks locked and opens with a credit card. That is not a smart lock problem, it is a framing problem, and I check it before I ever touch a battery.
Install time on a real door. A lock that installs in 20 minutes with a screwdriver beats a spec sheet every time, because the person buying it is standing in their hallway at 11 p.m. with the door open.
Setup order tolerance. Pair the lock to the app first, then add the gateway. If a lock punishes you for doing it backwards with a full factory reset, I want to know that before I recommend it, not after.
The 2.4GHz requirement. Most locks and gateways only speak 2.4GHz. If your router is broadcasting 5GHz only, or has the bands split with different names, the lock will never connect and the box will not tell you why.
Backup entry. Every lock I recommend needs a way in that does not depend on a working radio, a working battery, and a working app at the same time.
Subscription risk. Paying monthly to open your own door is the worst deal in smart home. If remote access requires a plan, that changes the math on the whole purchase.
The two locks I would install on a rental door
These are the two I would start with today. One is the budget play, one is the one I would put on my own front door if I wanted a camera on the porch.
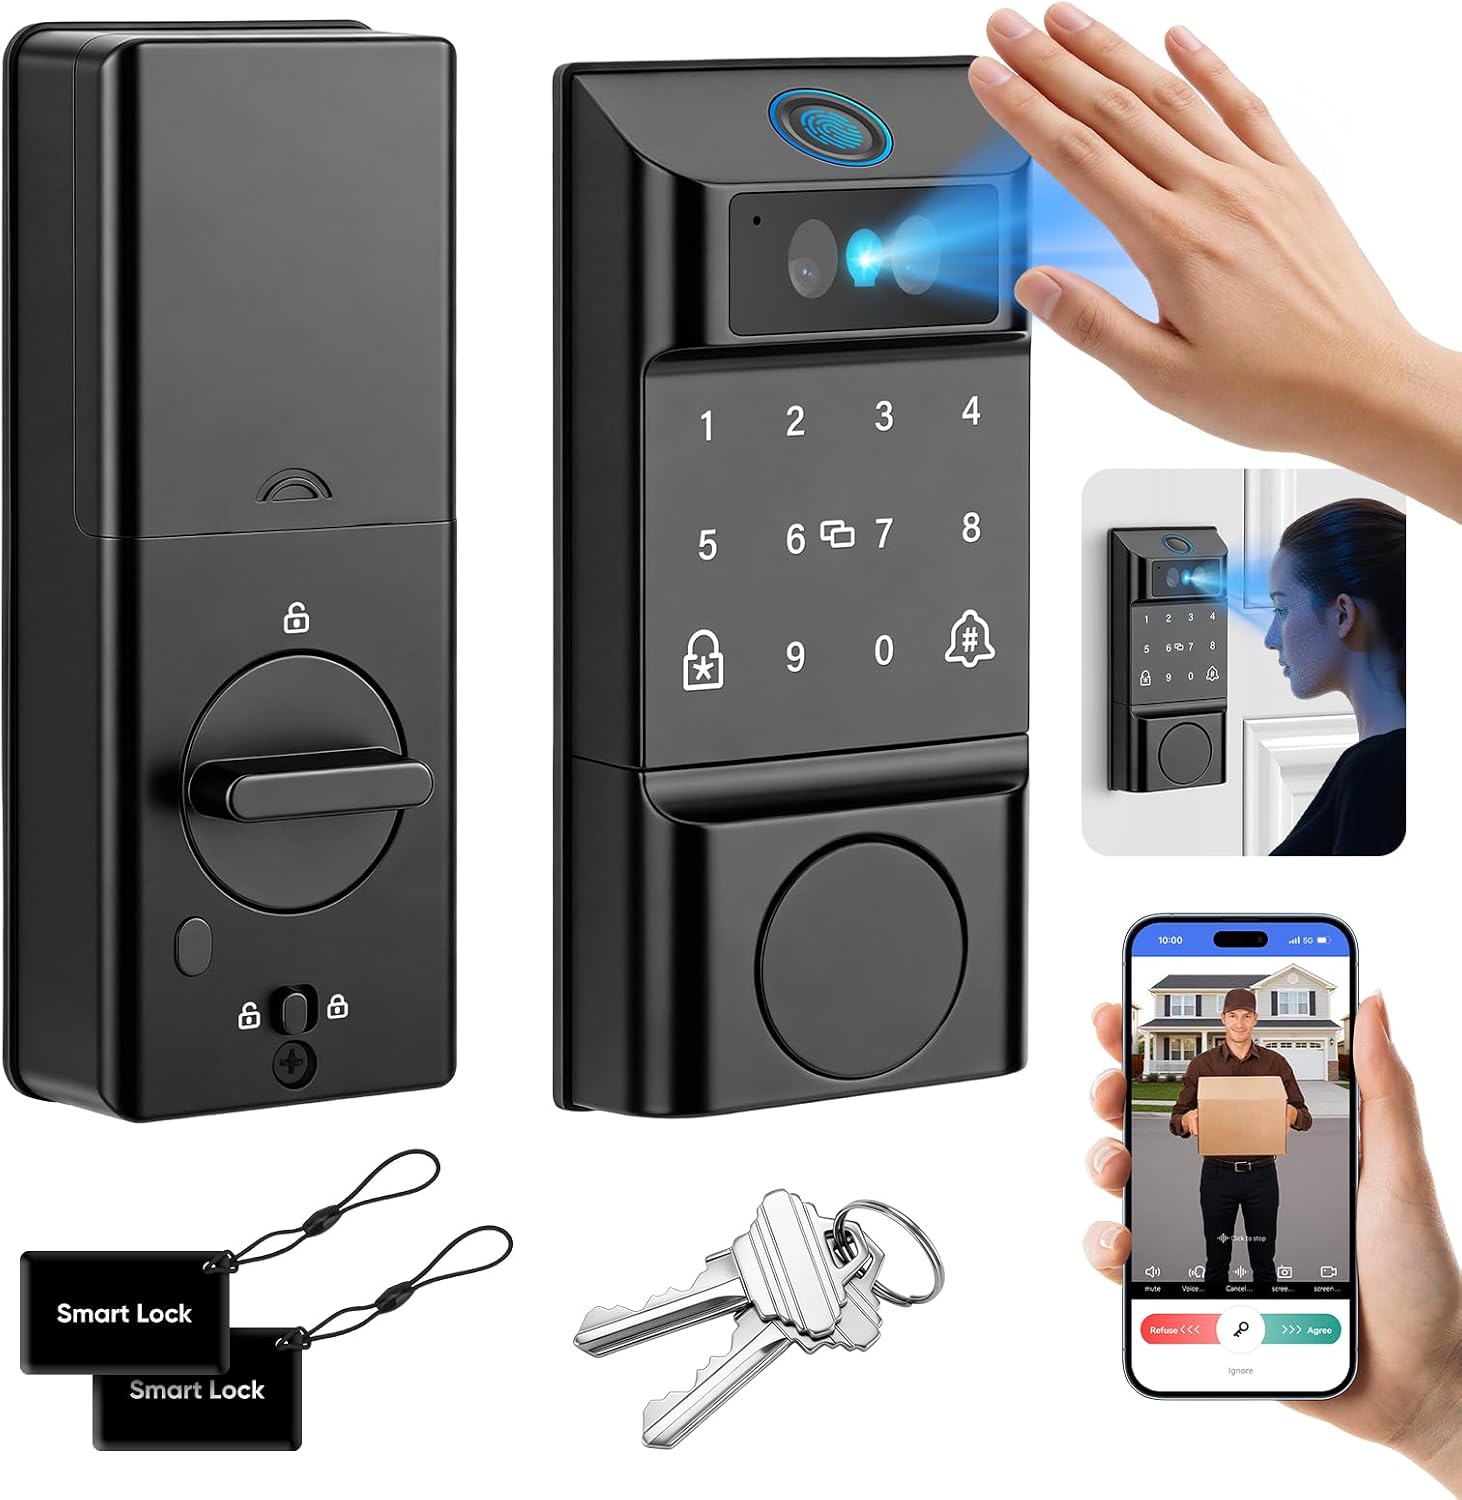
Budget pick: Smart WiFi Door Lock with Palm Print&Facial Unlock, Doorbell Chime Deadbolt
 Visit on Amazon →
This is the one I would hand a landlord who is tired of driving across town with keys. It is a WiFi deadbolt that unlocks by palm print or by face, and it also carries a doorbell chime, which saves you buying a separate chime if you want to know when somebody is standing at the door.
Here is why the palm and face angle matters to me. Fingerprint readers are fantastic for about six months and then they start missing on wet hands, cold hands, and hands that have been working. A palm reader does not depend on one fingertip, and a face reader does not depend on touching anything at all, which is exactly the situation when you are carrying groceries or a sleeping kid. That is the theory. Test it before you commit, and test it at night with the porch light on, because that is when most people actually come home.
The other thing I like about a deadbolt in this class is that it replaces the part of the door that actually keeps people out. If you have a standard deadbolt and a separate knob, this drops into the same holes, and you keep your existing handle.
Flaws but not dealbreakers: Face unlock is a convenience layer, not a security layer. Keep a code or a physical key as your fallback and set it up on day one, before you need it. And confirm in the listing what the lock does when the battery gets low, because a lock that dies silently on a rental is a lock that dies on a guest.
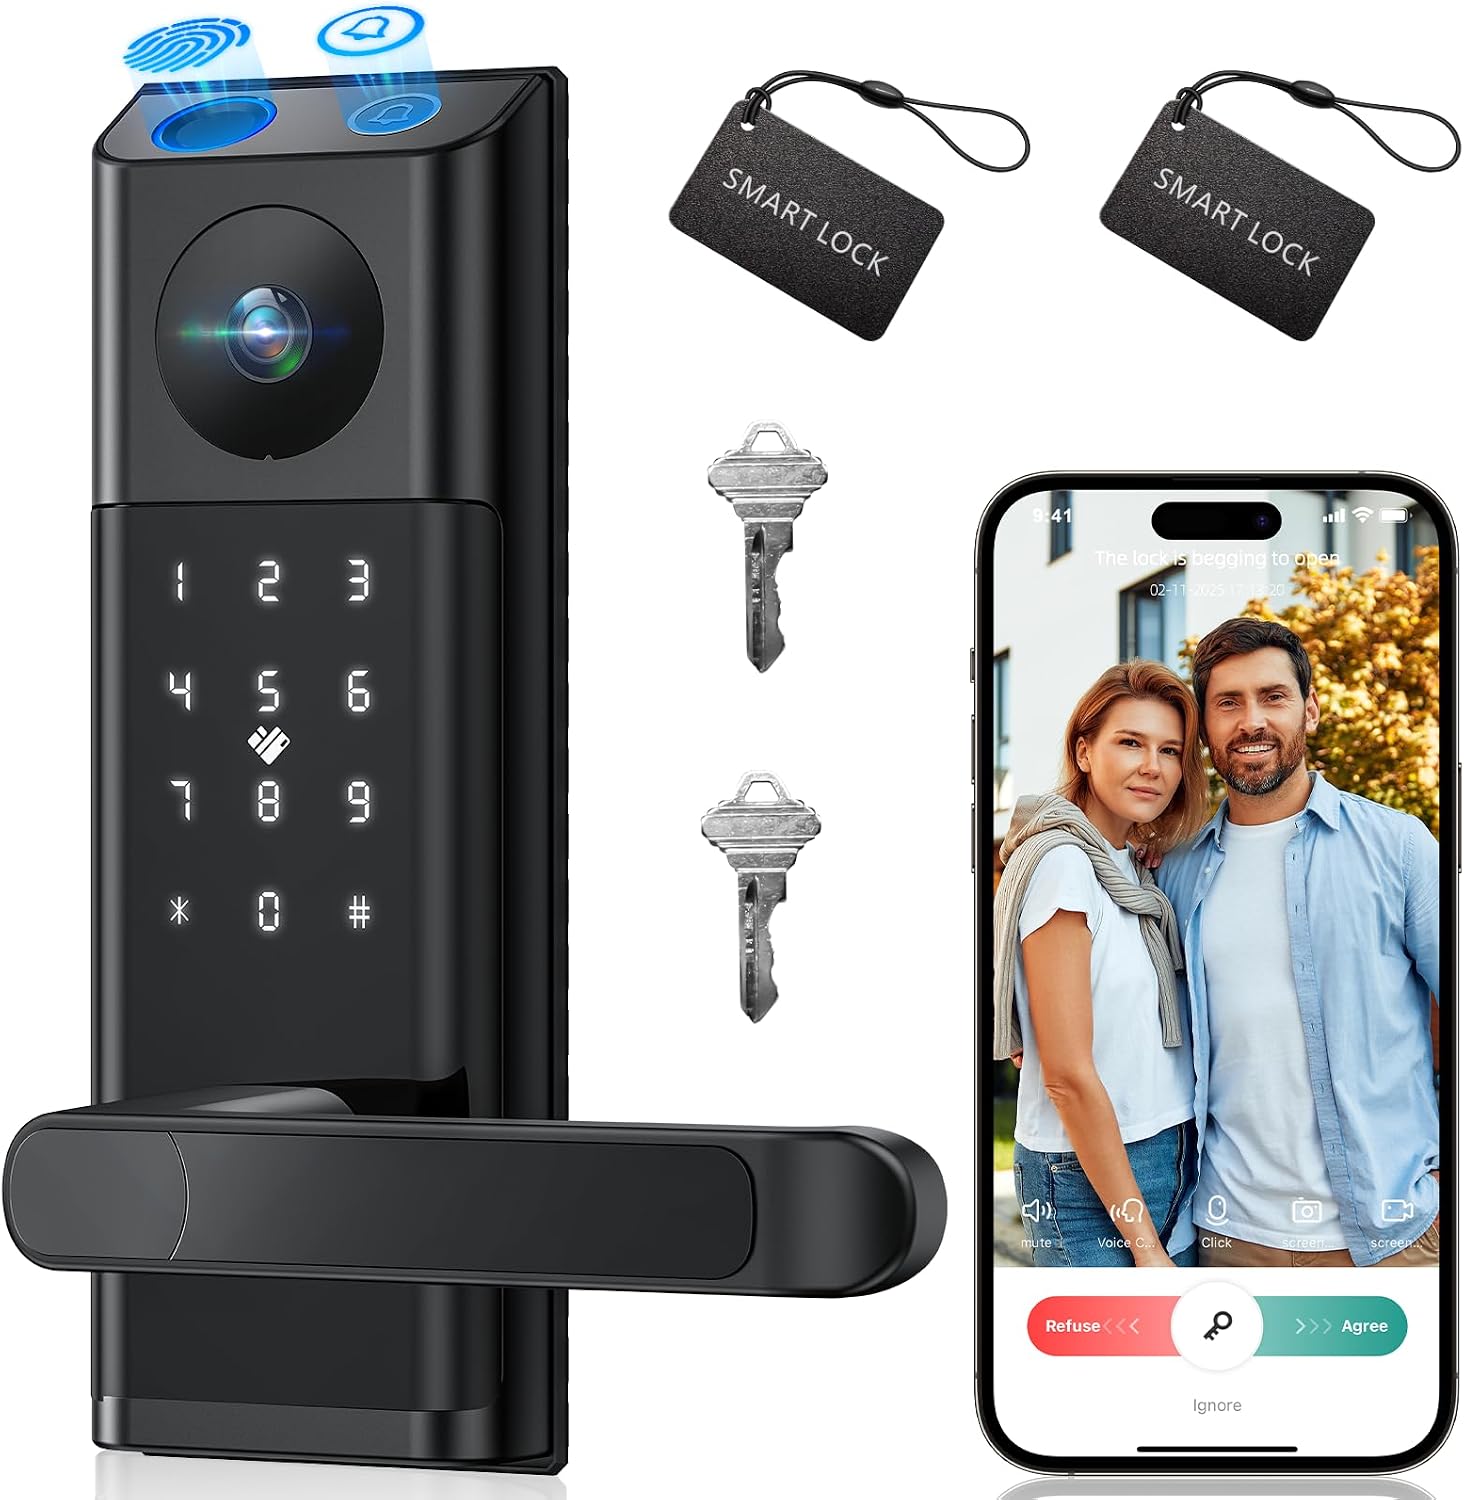
Our pick: Video Smart Lock with Camera & Doorbell, 5-in-1 Door Lock with Handle
 Visit on Amazon →
This is the one I would put on a door where I want the lock and the porch camera to be one piece of hardware instead of two. It combines a video camera, a doorbell, and the lock, and it comes with a handle, which matters more than people realize. If your door has a handleset rather than a plain deadbolt and a separate knob, this replaces the whole assembly in one shot instead of leaving you with a mismatched handle and a hole to fill.
The reason to care about field of view is simple: a camera that sees the whole porch beats a higher resolution camera that only sees the package thief's hat. When you are shopping, look at the angle, not the number. A camera pointed at the wrong part of the stoop is a camera that records nothing useful.
Two things to verify before you buy. First, check whether the camera side needs a subscription for anything you actually want, because cloud plans quietly cost more than the hardware after a couple of years. Second, if you rent, check your lease and check whether there is existing doorbell wiring, because that decides whether you are running on battery or on the house.
Flaws but not dealbreakers: A camera and a lock in one housing means one thing to charge, one app to check, and one device to replace if either half quits. That is the trade for not drilling a second hole in the frame. For a rental with a single front door, it is usually the right trade.
How to install the lock on a real door
Do these in order. Skipping one is how you end up on support chat.
Step one: measure before you order. Door thickness, backset (the distance from the edge of the door to the center of the bore hole, usually 2-3/8 or 2-3/4 inches), and whether you have a separate deadbolt and knob or a single handleset. Write the numbers down and match them to the listing.
Step two: check the frame. Look at the strike plate on the jamb. If it is loose, stripped, or has been chiseled out to death, fix that first. A great lock on a bad frame is a decoration.
Step three: check the bolt throw on the old lock. Close the door, throw the bolt, and look. If the existing bolt does not fully seat in the strike, your new lock will not either, and no amount of app setup will fix it.
Step four: pull the old hardware. Two screws on the interior plate, two on the exterior, and the bolt screws on the edge of the door. Keep the screws in a cup. You will need some of them again.
Step five: check the door is not swollen or out of square. This is a Columbus problem and a humidity problem. A door that sticks in July will fight a motorized bolt in January. If the door drags, fix the hinges or the strike before you mount anything smart.
Step six: install the exterior half and the interior half. Feed the cable through the door without pinching it. Pinched cables are the number one cause of a lock that powers on and then does nothing.
Step seven: test the bolt by hand before you put batteries in. Turn the thumb turn. It should throw smooth and full. If it grinds, stop and fix the alignment. Do not let a motor push through a bind, because that is how you burn out a gear in month three.
Step eight: batteries, then the app. Not the other way around. Read the pairing section below.
Step nine: with the door open, test everything. Code, palm, face, key. Then close the door and test again, because the door frame changes the alignment. Then do the credit card test: with the bolt thrown, try to slip a card past it. If it slides, the bolt is not fully extending and you need to adjust the strike plate.
How to pair the app and the gateway in the right order
This is the part that eats an afternoon, so here it is plainly.
Pair the lock to the app first. Get the lock into pairing mode, which on a lot of budget locks is an undocumented button combination, usually holding two buttons at once until the light does something specific. Sit next to the door while you do it. Bluetooth range is short and a lock that drops mid-pair is a lock you will be resetting.
Then add the gateway. The gateway is the small hub that bridges the lock's Bluetooth to your WiFi so you can check the door from anywhere. Adding the gateway first is the single most common mistake in this category, and doing it backwards usually means a factory reset and starting over.
Check your WiFi band before you start. If your router broadcasts one merged network name, temporarily split the bands or turn off 5GHz for the setup, then turn it back on after. If your router is 5GHz only, the lock will never connect, and no amount of retrying will change that.
Name everything while you are in there. "Front Door" and "Front Door Gateway" beat "Device 1" and "Device 2" when you are standing on a porch at midnight trying to figure out which one is offline.
Test one remote command before you walk away. Lock it from the app while standing inside. If the status does not update, the gateway is not talking to the lock, and you want to find that out now rather than from a guest.
How to set up guest access and auto-lock
Turn on auto-lock first. It is the single most underrated feature in this whole category. The tenant who forgot to lock up is the most common phone call in property management, and auto-lock ends that call forever. Set the delay long enough to get in with an armload of groceries and short enough to mean something, somewhere in the 30 second to 2 minute range.
Give every guest their own code. One code per person, not one code for everybody. That way when a stay ends, you delete one code and the rest still work, and you know exactly who came in at 11:40 p.m. on Tuesday.
Use the anti-peeping feature if the lock has one. Some locks let you type random digits before your real code so anyone watching over your shoulder only sees noise. Cheap locks rarely have it, and it matters more than people think on a street-facing door.
Set the code to expire. A guest code that lives forever is a key under the rock with extra steps. Tie it to the checkout time and let it die on its own.
Change the master code from the factory default. Immediately. Before you do anything else. This is the one step people skip and it is the one that actually matters.
What you are paying for, and what it costs per door
There are two numbers that decide whether a lock is worth it: the cost per door, and whether anything about it bills you monthly.
The budget deadbolt is the one that makes a landlord's math work, because you are buying hardware, not a plan. The video lock costs more per door, and it replaces two devices, so the honest comparison is against the price of a lock plus a separate video doorbell, not against the price of a lock alone.
Then ask the subscription question. If remote access, saved clips, or anything you actually use requires a monthly plan, multiply that by twelve and then by the number of doors you own. That is the real price. A lock that costs a little more up front and bills you nothing is usually the cheaper lock by year two.
The install itself is free if you do it, and it is about 20 minutes once you have measured the door correctly. That 20 minutes, done in the right order, is the difference between a lock that works for five years and a lock that ends up in a drawer with a factory reset and a bad review attached to it.
Do it once, do it in order, and you will never think about your front door again until the battery beeps.